
Last Updated on January 27, 2023 by Lori
Here’s how to make an easy light-up Camp Bucket for the campground!
Have you seen those cute camping bucket lights at the campground and wondered where people get them?
Me too!
So, I set out to find an easy way to make my own bucket light to take to the campground.
How To Make A DIY Camping Bucket Without A Cricut Maker

This post contains affiliate links which means if you click on a link and make a purchase, I will earn a commission at no additional cost to you. Please see our Disclosure Policy for more information.
When researching how I could make a camping bucket, I found many DIYers had their own Cricut Maker to design and cut out the vinyl for the bucket.
But, I don’t own a Cricut Maker.
So, I set out to find a way I could make a camping light bucket without a Cricut Maker and found it was relatively easy to do!
What Are Camping Buckets Used For?
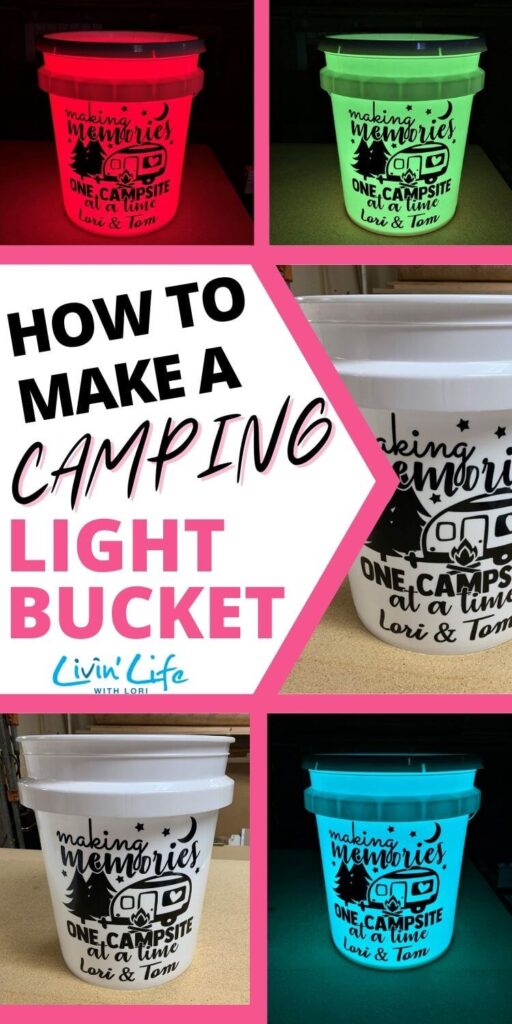
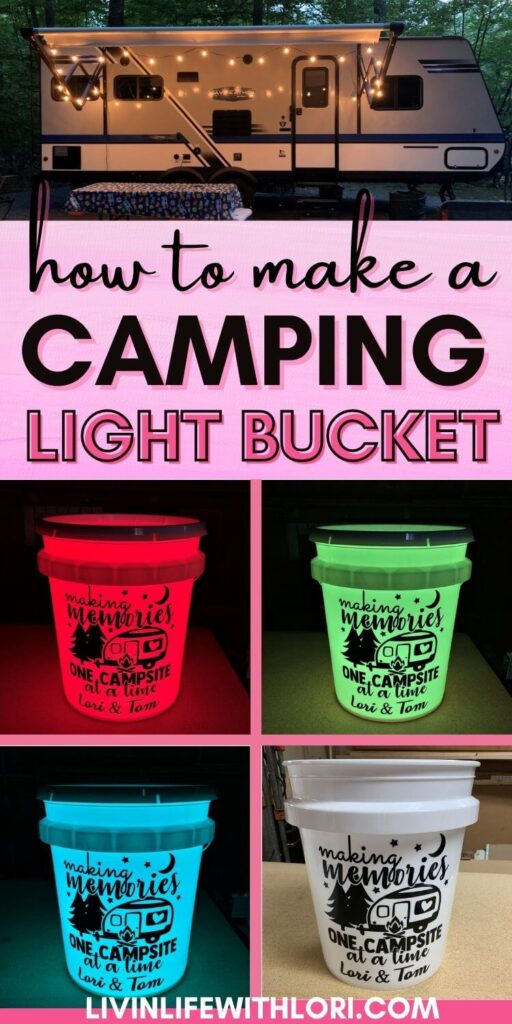
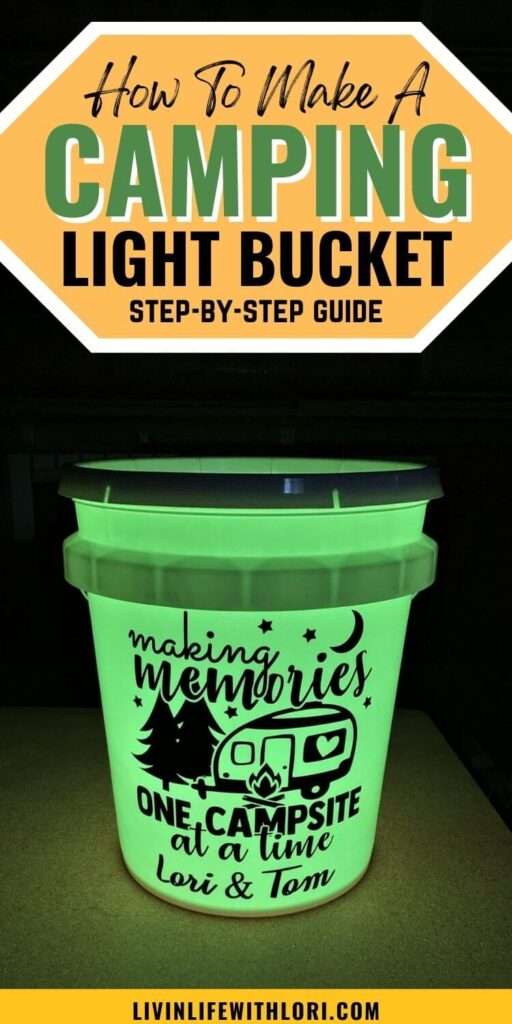
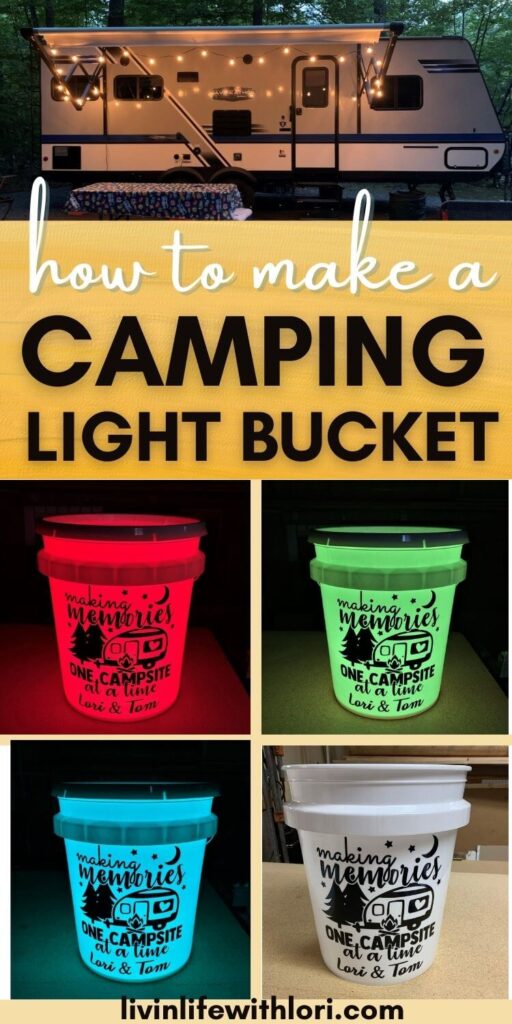
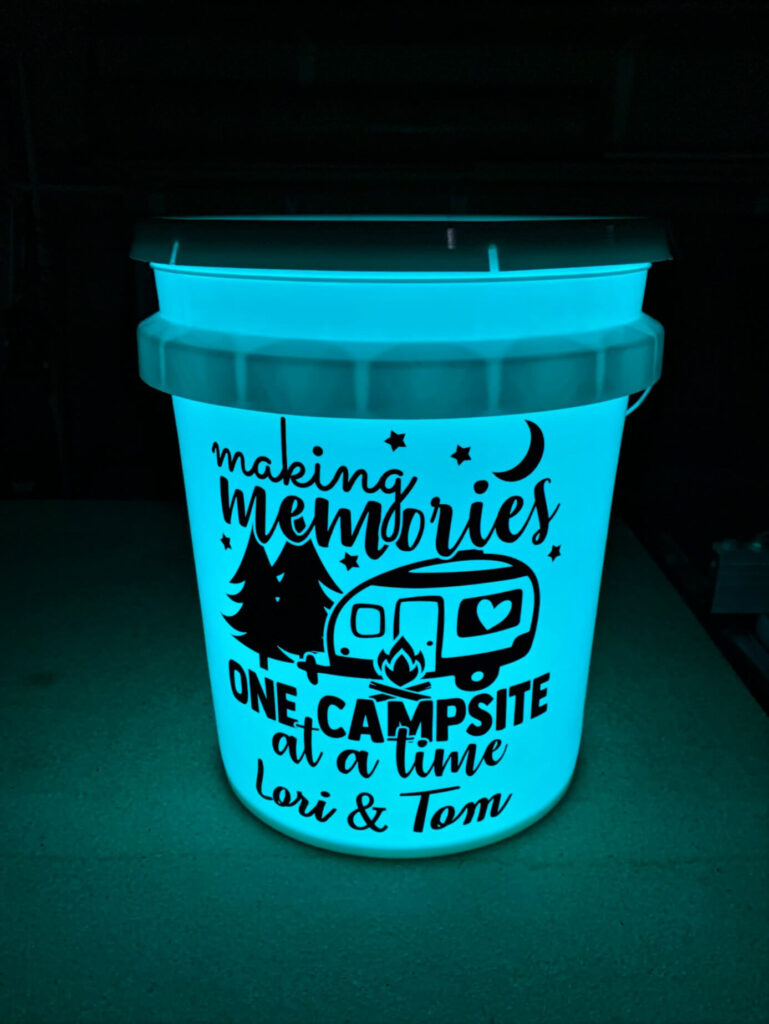
A camping bucket can be used to carry your camping gear to your campsite. At night, use them as a bucket lantern inside your tent and as an outdoor camp light around your campsite.
How To Make LED Bucket Lights
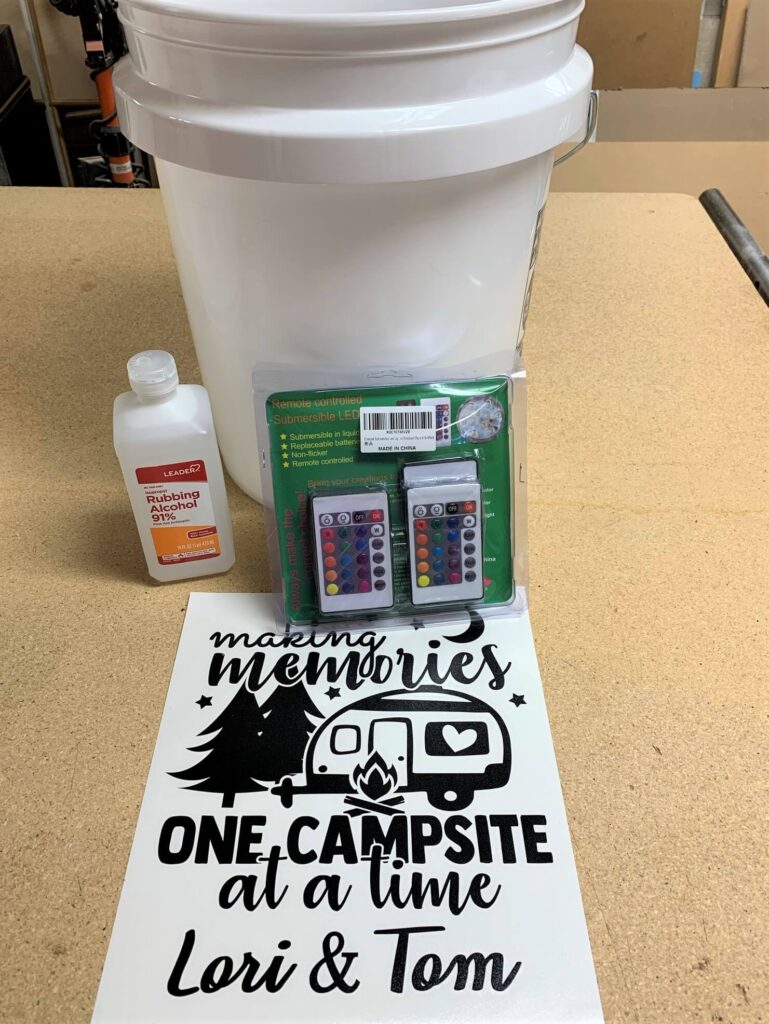
First, you will need to purchase a white 5-gallon bucket. I found this white bucket with a lid at Lowe’s, but you can purchase them at other home improvement stores.
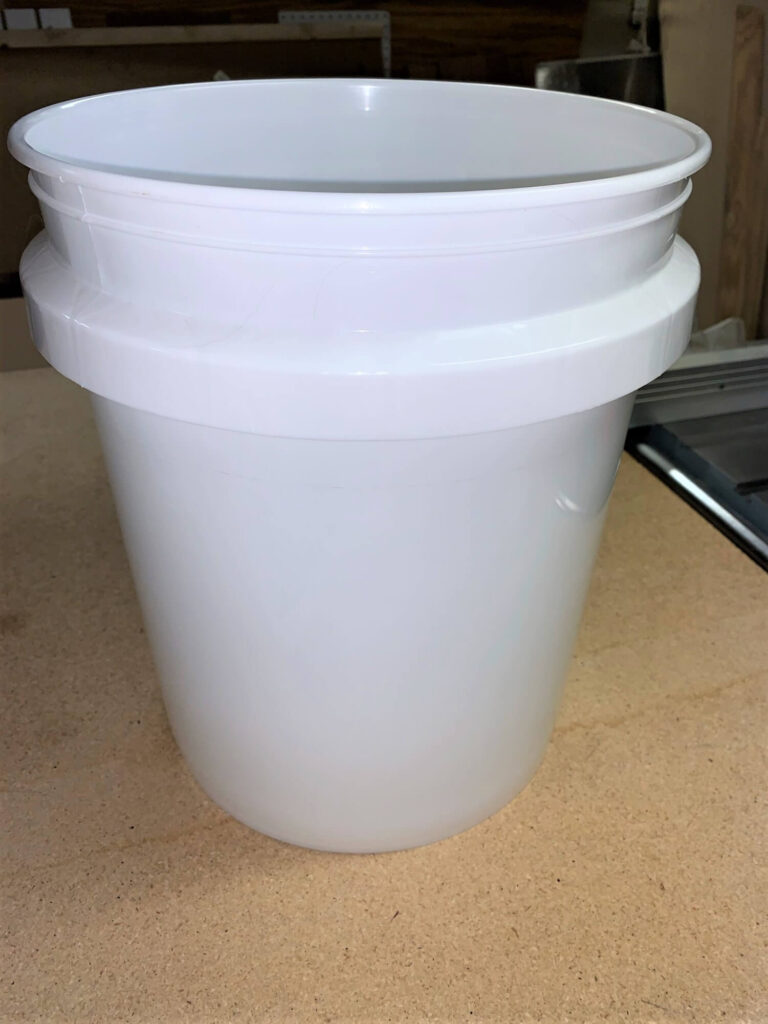
Be sure that the bucket doesn’t have any labels on it so you can add your design!
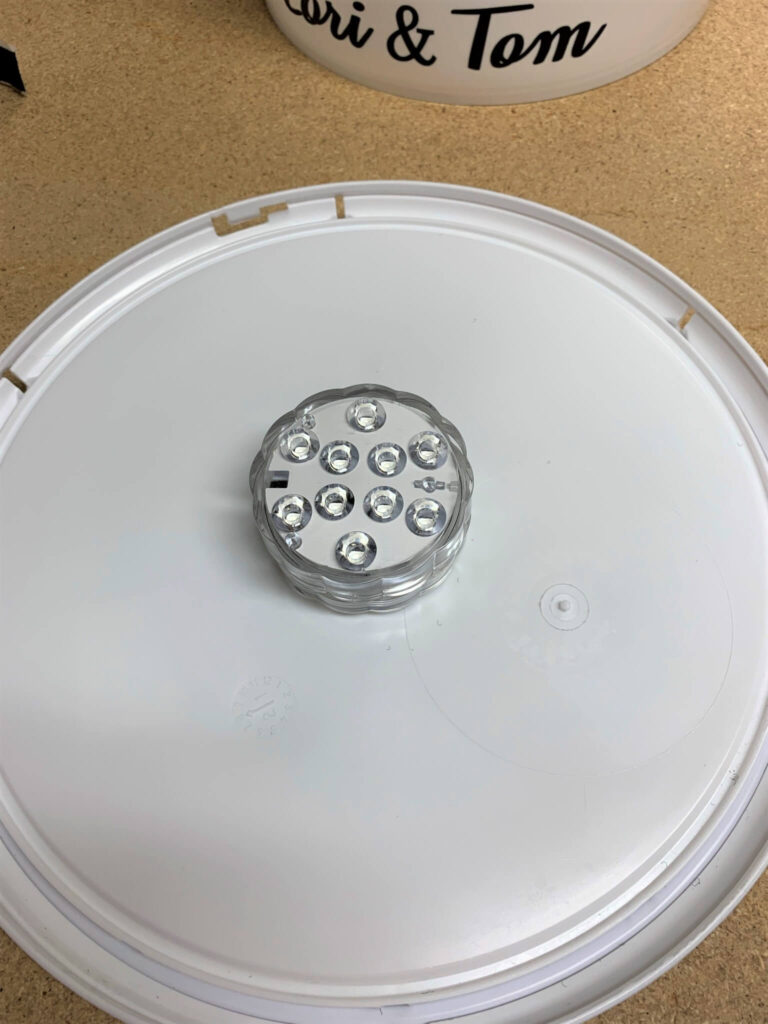
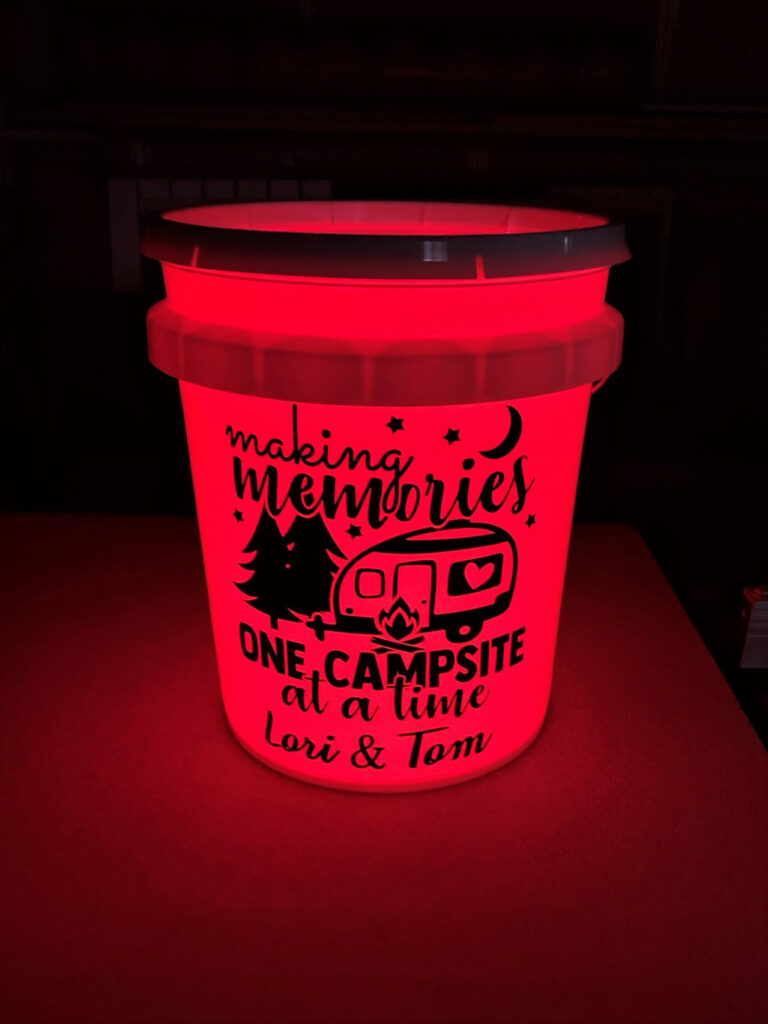
Then you will need lights to light up the bucket. I found this set of LED lights, which are submersible lights and come with remote control and four (4) colored lights.
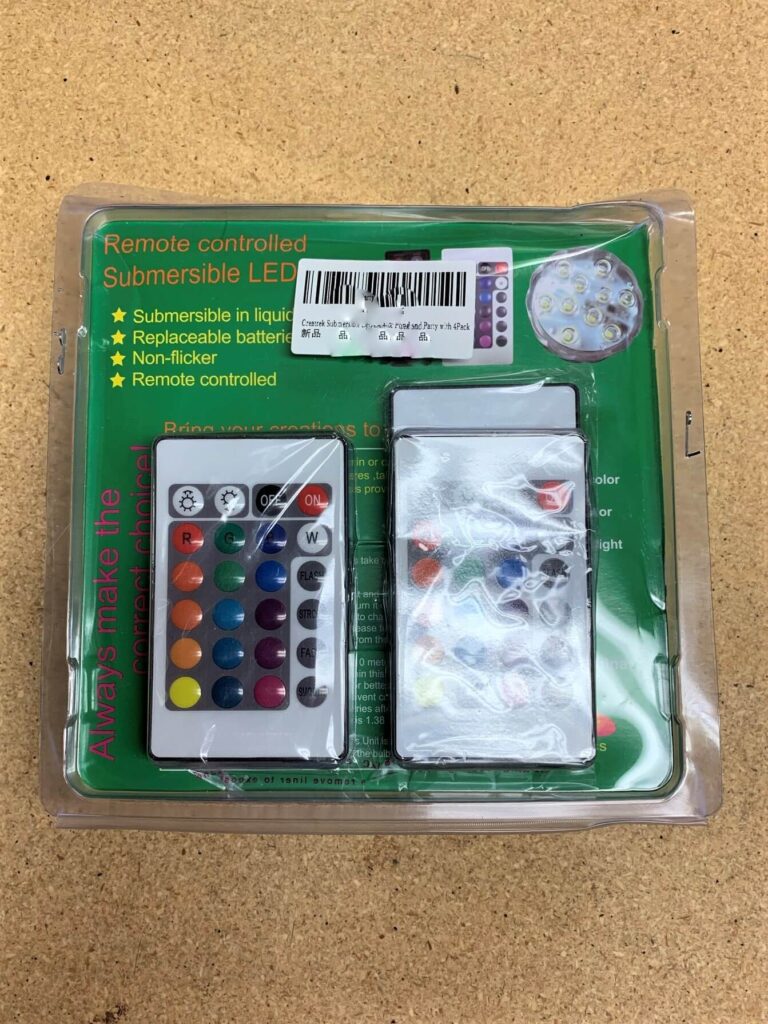
The remote control is a nice feature so we can turn off the lights while sitting by the campfire!
Some campers fill their camp buckets with water to keep them from blowing away. These lights are submersible so they work underwater too!
Another way to add lights to your bucket is to Velcro the light to the inside of the lid
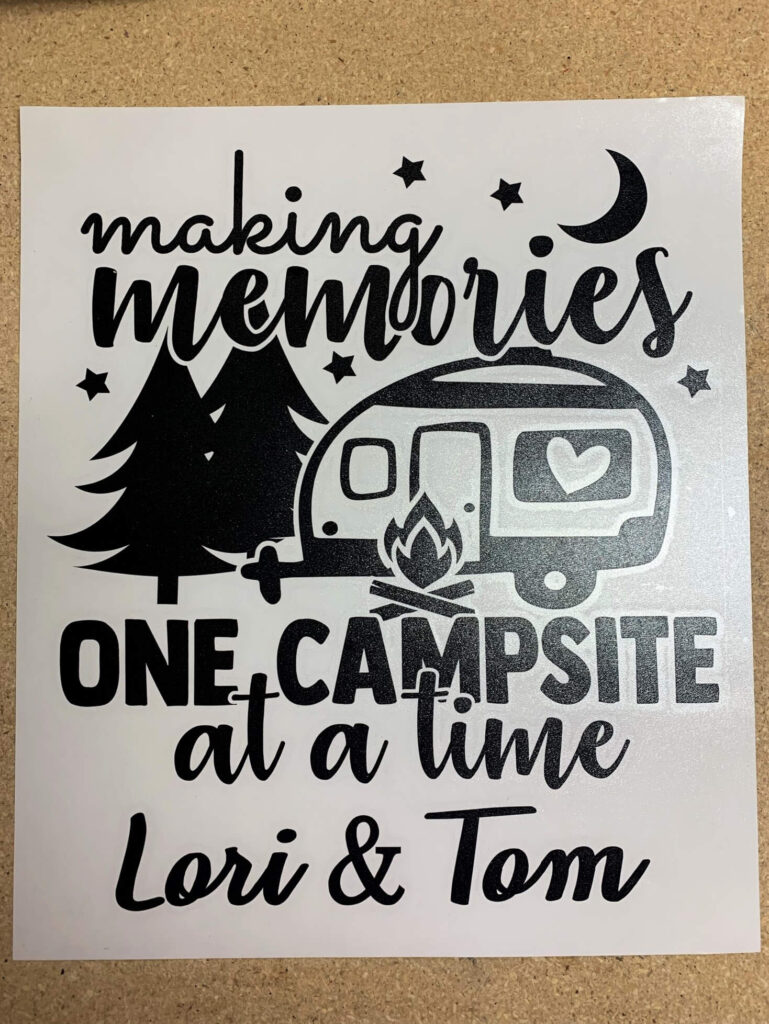
The last thing I needed (and the most important!) was the vinyl decal.
As I mentioned, you can create your own SVG files or use a free SVG Cricut design found on many websites, on a Cricut Maker and print the vinyl decal at home.
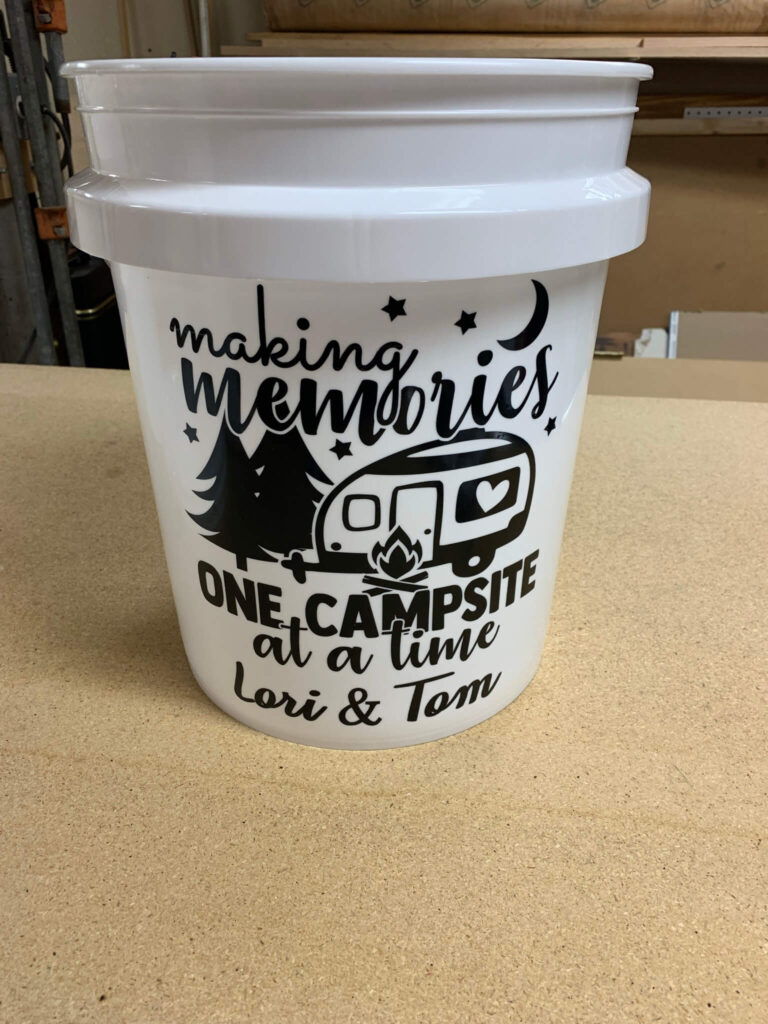
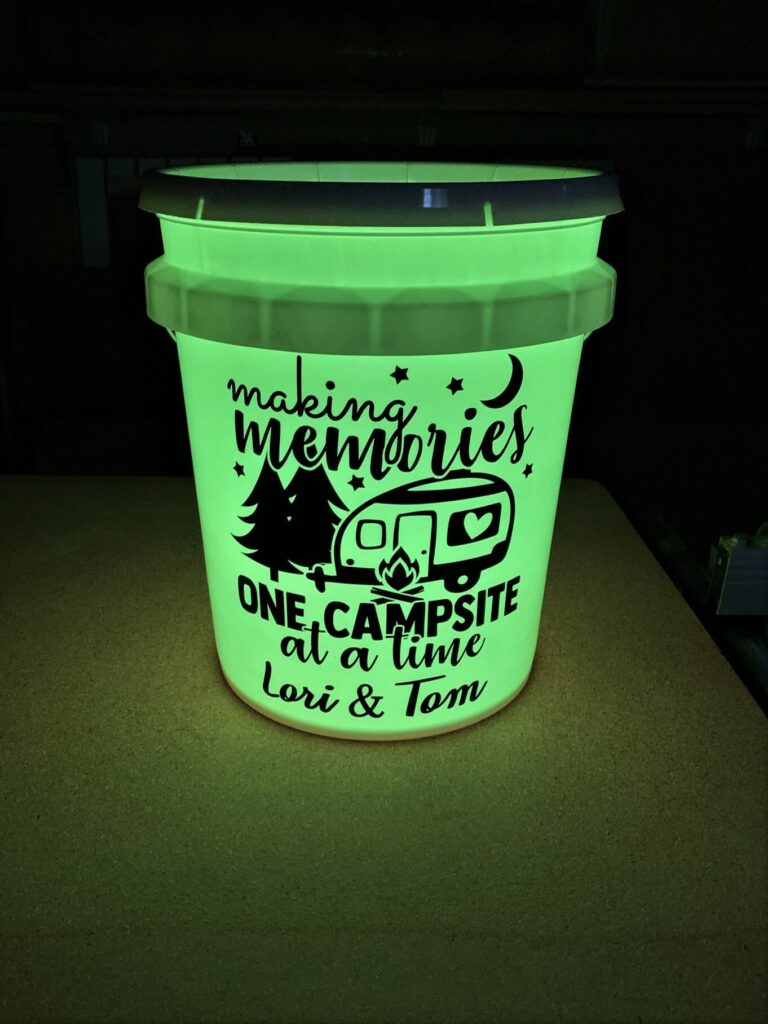
I found this camping vinyl design on Etsy and added our names to have it personalized!
I thought the retro camper in the vinyl design was cute and loved the saying:
Making Memories One Campsite At A Time – Lori & Tom
You can also purchase a complete camping bucket light kit on Etsy (bucket not included).
Materials Needed To Make A Lighted Bucket For Camping
Materials List
- Plastic white bucket with lid
- LED Lights
- Permanent vinyl decal with transfer tape. I found this vinyl camping design on Etsy and it worked well.
- Velcro Strips
- Rubbing Alcohol
- Ruler (optional)
- Painter’s Tape (optional)
Tips How To Apply A Vinyl Decal
Clean the surface of the bucket with rubbing alcohol and let dry.
Do not use window cleaner or other ammonia-based cleaners.
Do not apply the decal in direct sunlight or if the temperature outside is below 50 degrees or over 90 degrees.
High humidity will affect the transfer tape.
How To Make A Bucket Light For Camping
Step One:
Lay decal, face-up on a smooth hard surface. Use a credit card to ensure the transfer tape is pressed firmly against the vinyl.
Step Two:
Carefully position your vinyl decal on the 5-gallon bucket.
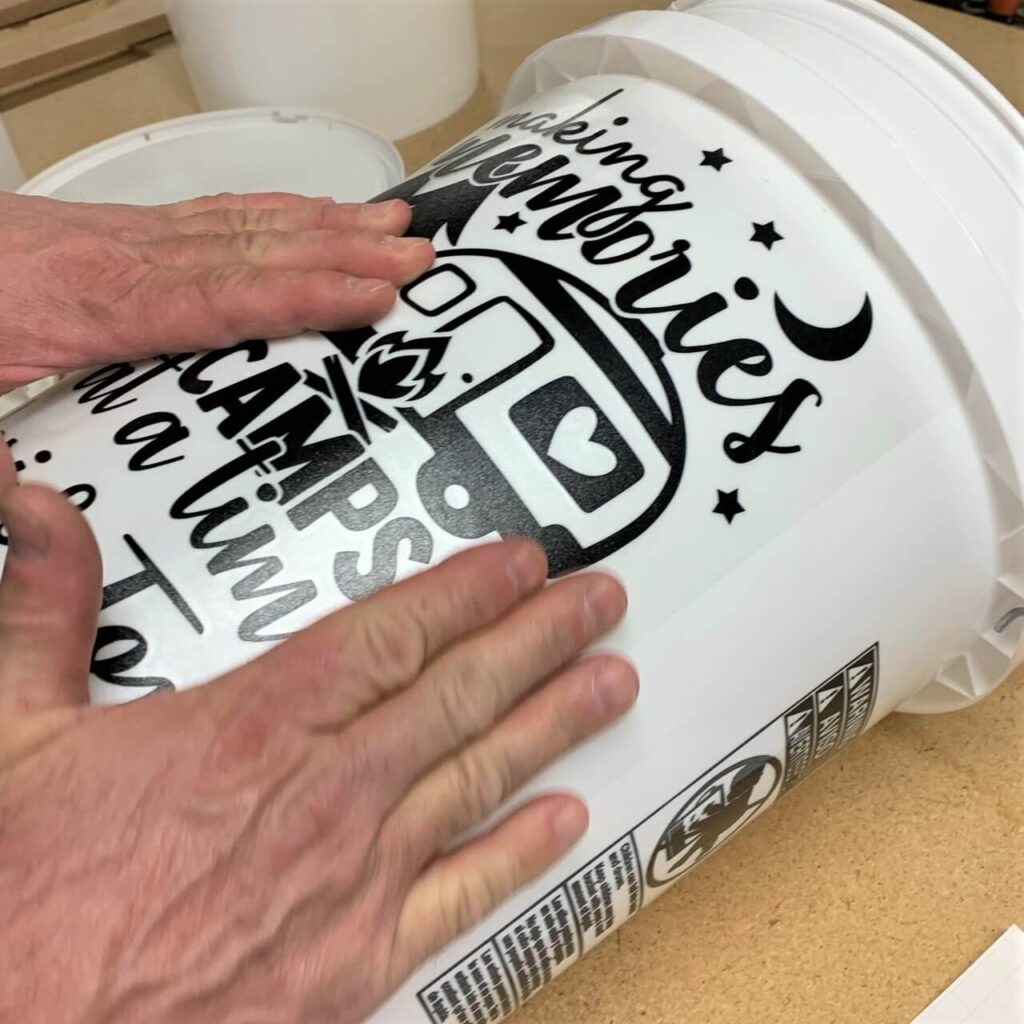
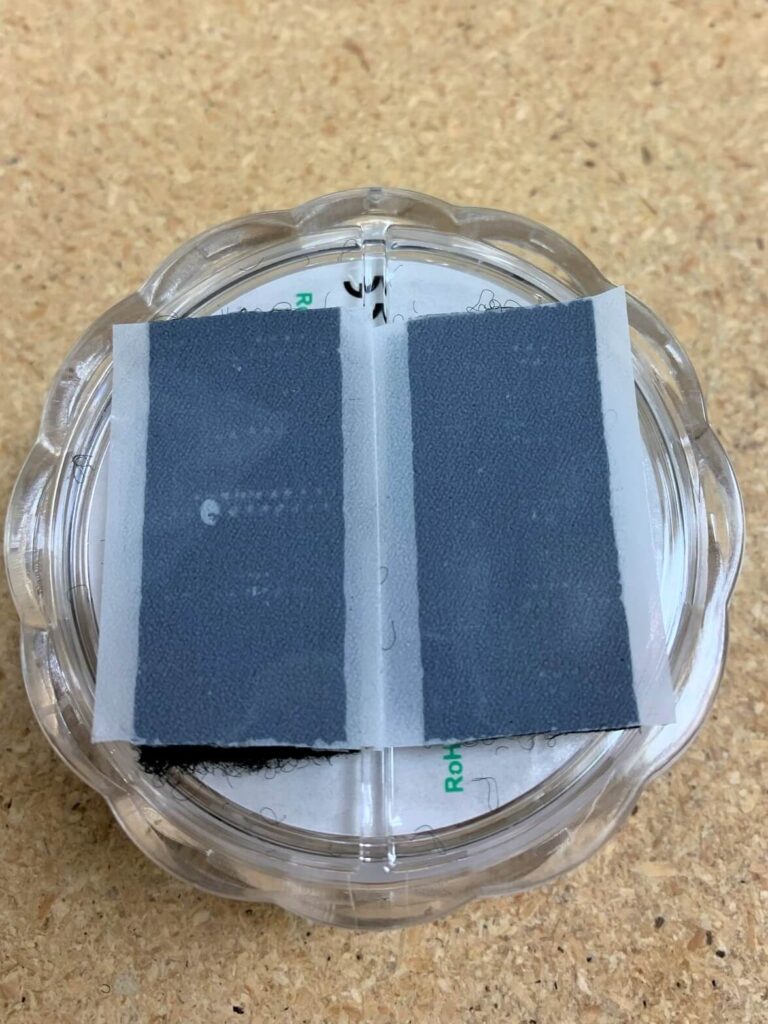
You might find it helpful to use painter’s tape to tape the decal into place by taping the decal down the middle.
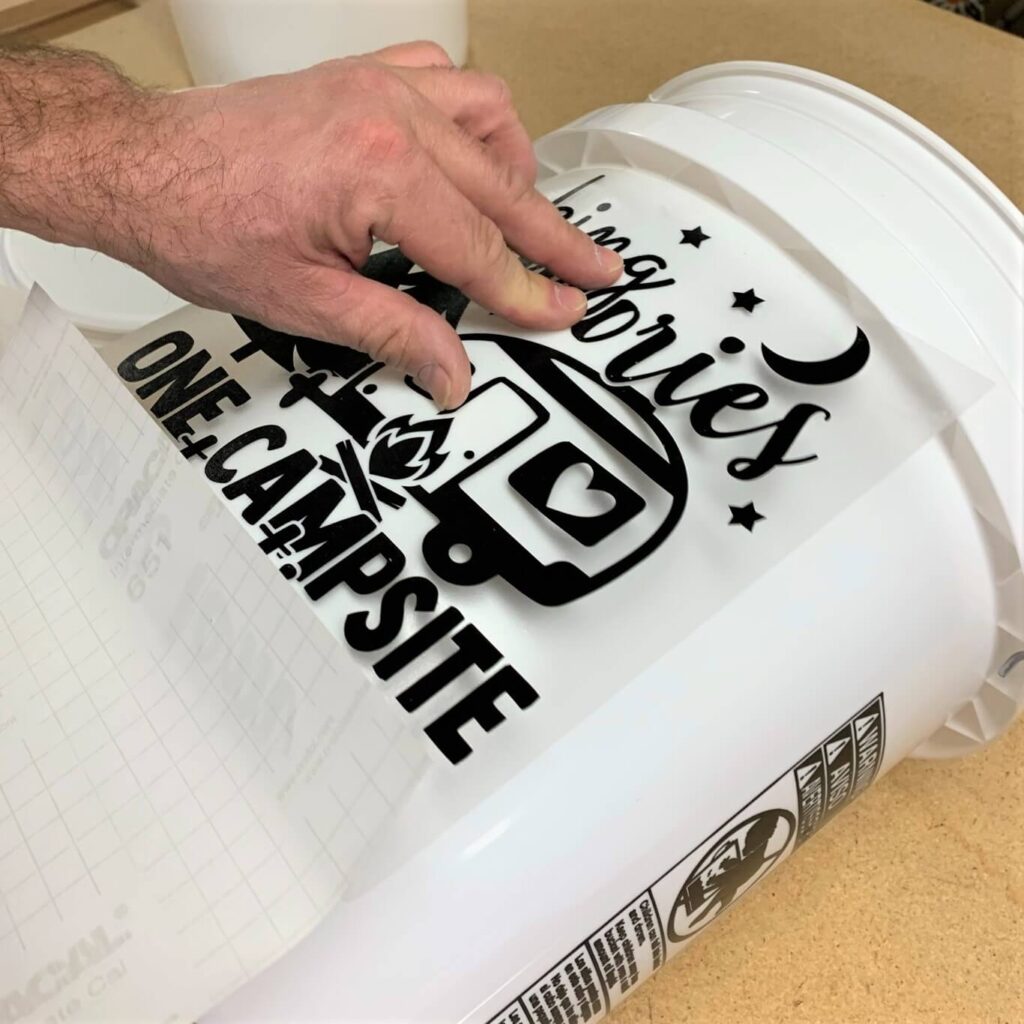
Then using the Hinge Method, remove one side of the vinyl and press it into place.
Slowly remove the strip of tape and the rest of the vinyl.
Press into place.
Using a credit card, press over it several times, so it sticks to the bucket.
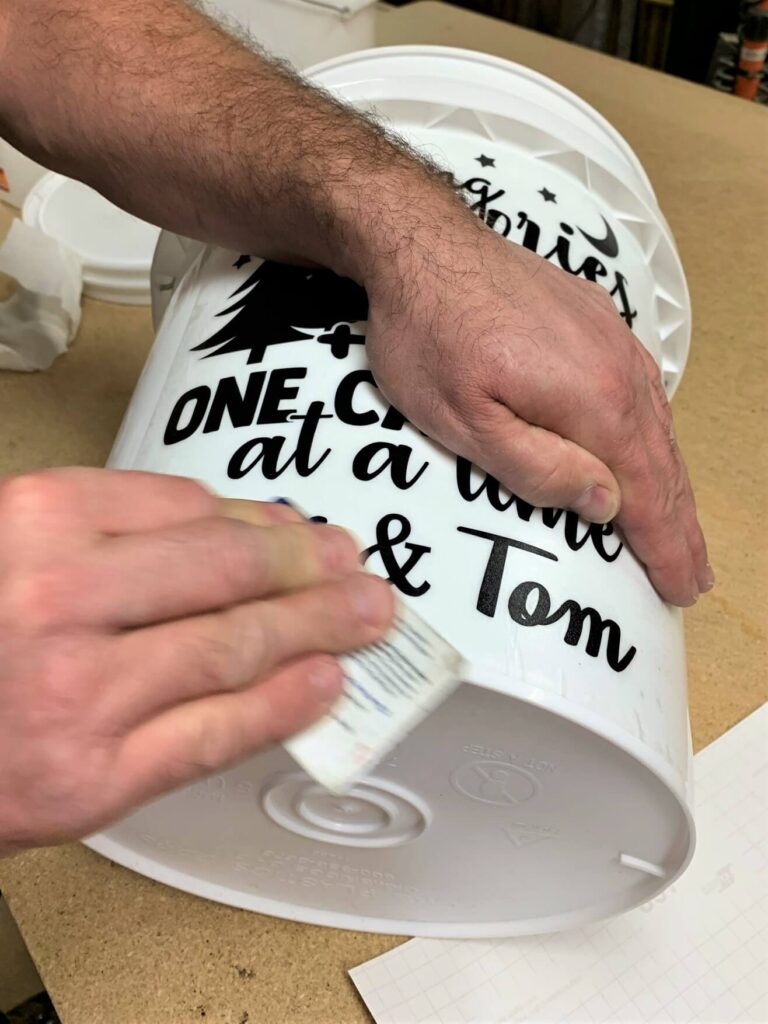
Step Three:
Carefully remove the transfer tape by peeling it away at an angle.
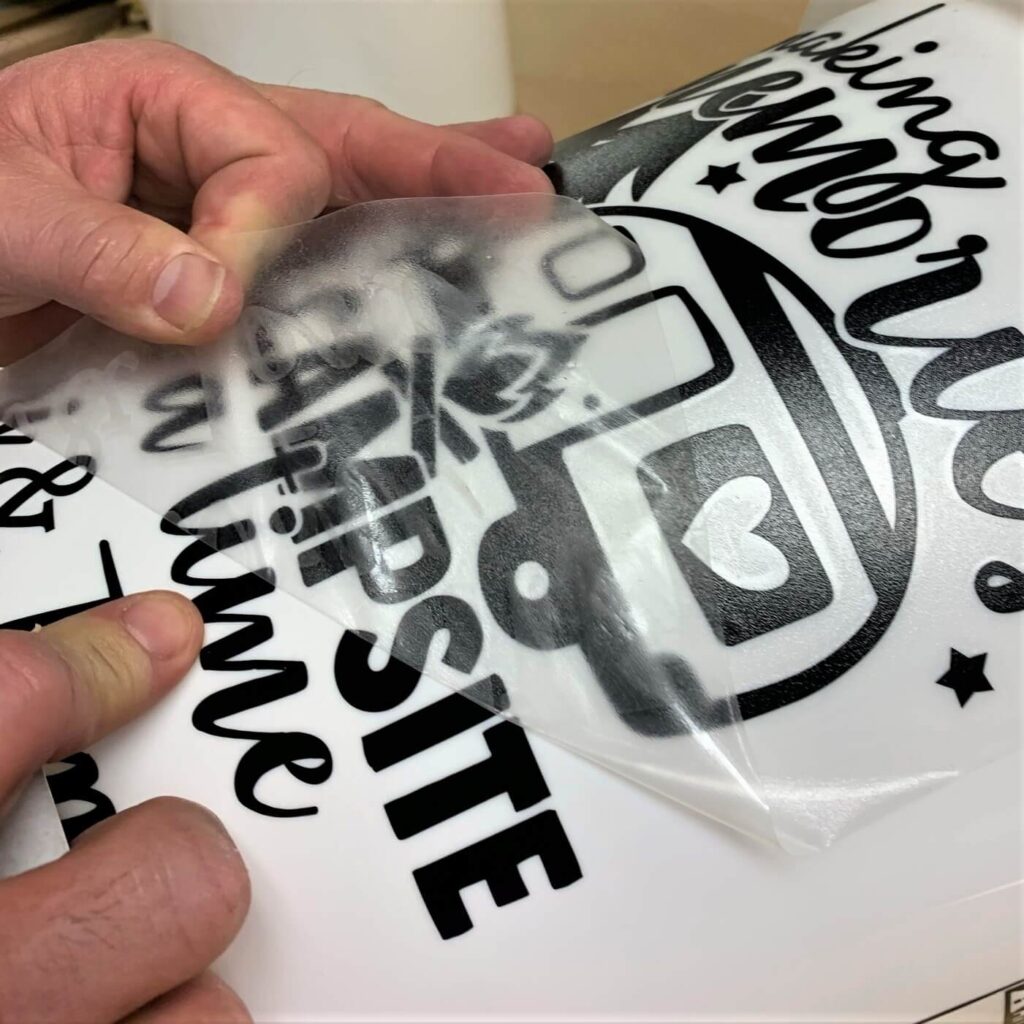
Peel slowly, making sure the vinyl stays adhered to the surface.
If the design tries to come off, rub it some more.
We found that the block letters easily stayed in place but we had to be careful with the cursive letters when taking off the transfer tape.
Step Four:
Add the LED Lights to the bucket
Place a command strip (velcro strip) on the LED light. Depending on the bucket you purchased, you may have to put two layers of strips on the light.
We found our bucket had a bump so that when we first added the light it wasn’t straight. Adding an additional strip of velcro solved this problem.
Here’s our Camping Light Bucket!
Happy Camping!


1 comment
This is so cute! Thank you for sharing and giving clear instructions with options.
Lori – great name! 🙂